Digging tools should be cared for, every passionate gardener knows that their success depends not only on skill but also on the condition of their digging tools. Whether you are preparing soil, planting new blooms, or creating fresh garden beds, digging tools are the backbone of any garden project. High-quality digging tools save time, reduce strain, and make even the toughest gardening jobs easier.
When your digging tools are well cared for, gardening becomes smoother, more enjoyable, and far more productive. Well-maintained digging tools cut through soil with ease, protect your plants, and last for many seasons. But when your digging tools are neglected, rust, dullness, and wear can quickly turn simple gardening tasks into frustrating chores.
In this guide, we will dive deep into five essential tips to care for your digging tools. You’ll learn how to clean, sharpen, oil, store, and repair your digging tools so they stay in top condition year-round. Each section will give you practical advice, real-life examples, and expert-level maintenance techniques so you can get the most out of your digging tools and enjoy every moment in the garden.
By the end, you’ll understand exactly how to keep your digging tools in excellent condition for years to come. For a simple, safe way to disinfect and remove stubborn grime, try this guide on cleaning garden tools with vinegar.”
1. Clean Your Digging Tools After Every Use
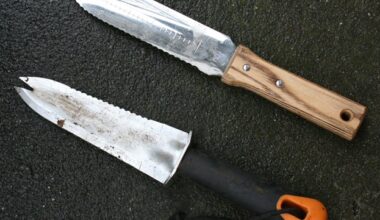
Keeping your digging tools clean is the first and most critical step in tool care. After a day of gardening, your shovel, spade, or trowel often comes back covered in dirt, clay, and even plant sap. If left on the metal, this moisture and debris can quickly lead to rust or pitting.
Rinse your digging tools thoroughly under running water, and use a stiff brush or wire brush to scrub away compacted soil. For stubborn clumps of clay, a putty knife can be an excellent choice. Once you’ve removed the dirt, always dry your digging tools with a clean rag or towel.
Moisture is the number one enemy of metal tools, and a simple wipe-down can prevent rust from forming.
Many experienced gardeners keep a bucket of sand mixed with a little oil nearby—after cleaning, they plunge their digging tools into the sand several times. This step removes fine particles and lightly coats the metal with oil, giving added protection.
Why It Matters: Clean digging tools last much longer, cut through soil easily, and prevent soil-borne diseases from spreading across your garden.
Common Mistake to Avoid: Leaving your digging tools outside overnight or forgetting to rinse them after use. Even a single night’s exposure to rain or dew can leave visible rust spots by morning.
Always follow up sharpening with a quick wipe-down and a light coat of oil to protect the edge. to Top 7 Stainless Steel Tools Every Serious Gardener Should Own.
2. Sharpen Your Digging Tools Regularly
Sharp digging tools are a gardener’s secret weapon. Whether you are turning over compacted soil, slicing through stubborn roots, or edging a flower bed, a sharp blade reduces effort and speeds up your work.
To sharpen your digging tools, use a flat file, sharpening stone, or handheld grinder if you’re comfortable with power tools. Hold the tool securely and run the file at a consistent angle, usually about 30–45 degrees along the edge.
Regular sharpening should be part of your gardening routine, especially at the start of each season.
If you notice your shovel bouncing off hard soil or your hoe tearing rather than cutting weeds, it’s time for a touch-up. Always follow up sharpening with a quick wipe-down and a light coat of oil to protect the edge.
Why It Matters: A sharp edge means cleaner cuts, healthier plants, and less physical strain. Using dull digging tools can damage plant roots by tearing rather than slicing them, slowing recovery.
Pro Tip: Keep a small handheld file in your tool shed so you can sharpen your digging tools as soon as they start getting dull. . 9 Best Garden Clean-Up Tools for Every Season.
3. Oil and Lubricate Your Digging Tools
Rust is the silent killer of all metal tools. To keep your digging tools in excellent shape, always apply a light coat of oil after cleaning and sharpening. Use boiled linseed oil for wooden handles and vegetable oil, machine oil, or even WD-40 for metal parts.
This thin layer creates a barrier between the metal and moisture, slowing down rust formation. If your digging tools have moving parts—like folding shovels or multi-purpose tools—apply a drop of lubricant to the hinges to prevent squeaking and stiffness.
Wooden handles should not be overlooked either. Sand them lightly once or twice a season and rub in linseed oil to prevent splinters and cracking.
Why It Matters: Oiling keeps your digging tools smooth, easy to use, and protected against the elements.
Extra Care Tip: Store an old rag soaked with oil in a sealed bag and use it to wipe down your digging tools every time you put them away. 7 Garden Tool Storage Hacks Every Gardener Should Know.
4. Store Your Digging Tools Properly
Proper storage is just as important as cleaning and oiling. Leaving your digging tools outside is the fastest way to ruin them.
Always store your digging tools in a cool, dry, and well-ventilated space such as a shed or garage. Hanging them on a wall rack keeps them organized, prevents accidental injury, and stops edges from dulling.
If you live in a humid climate, consider using a dehumidifier or moisture-absorbing packets in your storage area. You can also store your digging tools in a bucket filled with oily sand to keep them clean, sharp, and rust-free.
Why It Matters: Proper storage extends the life of your digging tools and keeps your gardening space safe and tidy.
Common Mistake to Avoid: Leaning your digging tools against a wall or leaving them in a heap, which can warp handles and create hazards.
5. Repair and Replace Parts When Needed
Even with excellent care, your digging tools will eventually show signs of wear. Digging tools with wooden handles may loosen over time, metal blades on digging tools can chip, and bolts or fasteners can work themselves loose with repeated use. Regularly inspecting your digging tools helps you catch these issues early.
Fix small issues immediately—tighten any loose screws or nuts on your digging tools, replace cracked or splintered handles, and file down sharp burrs on the blade to prevent injury. If the blade of your digging tool is too corroded, bent, or dull beyond repair, or if the handle is beyond saving, it’s safer and more efficient to invest in a new digging tool. When replacing, choose high-quality digging tools made with tempered steel blades and durable hardwood or fiberglass handles for longer-lasting performance and better grip.
Why It Matters: Regular inspection and maintenance of your digging tools keep them safe, efficient, and comfortable to use. Well-maintained digging tools require less effort, reduce strain on your hands and back, and help you work faster in your garden.
Pro Tip: Keep spare handles, bolts, washers, and even a sharpening file in your toolkit so you can quickly repair your digging tools whenever needed. Storing your digging tools in a dry, covered place also prevents rust and prolongs their lifespan.
Dirty digging tools can spread harmful fungi, bacteria, and pests from one part of your garden to another. After working with diseased plants, disinfect your digging tools using a vinegar solution, diluted bleach (1 part bleach to 9 parts water), or rubbing alcohol.
6. Disinfect Your Digging Tools to Prevent Disease
This step is often overlooked but can save your plants from serious infestations or disease outbreaks.
Why It Matters: Disinfected digging tools protect your plants and help maintain a healthy garden ecosystem.
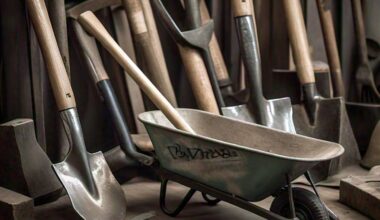
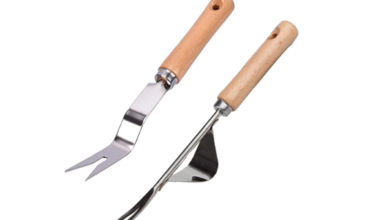
7. Use the Right Digging Tool for the Job
Not all digging tools are created equal, and using the wrong one can quickly turn a simple gardening task into a frustrating chore. The right digging tools not only save time but also protect your body from strain and fatigue. Choosing wisely ensures that your gardening is efficient and your tools last longer.
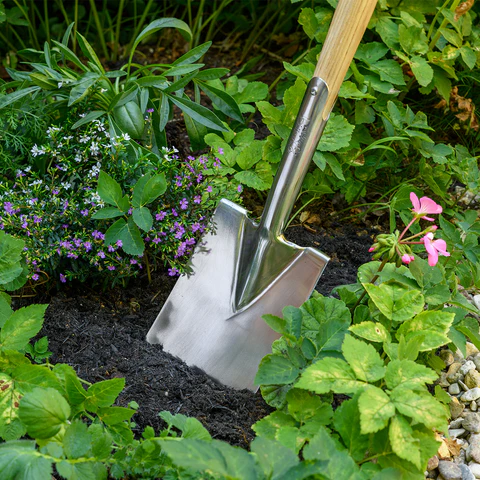
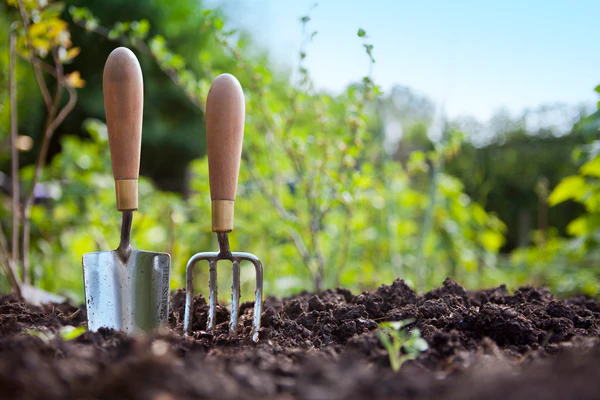
Each type of digging tool is designed for a specific job, and knowing which one to use can make a big difference. For example, a sturdy garden spade is perfect for edging beds, transplanting shrubs, and moving soil from one spot to another. Its flat blade makes clean, precise cuts, and when kept sharp, this digging tool can glide through compacted soil with ease.
A digging fork, on the other hand, is one of the most versatile digging tools in your shed. It’s excellent for loosening heavy clay soil, turning compost, and lifting root crops like potatoes or carrots. Because its tines penetrate the soil without slicing through plant roots, it’s a gentler digging tool for areas where you want to preserve existing plants.
When working with pots, raised beds, or small spaces, a narrow trowel is the perfect digging tool to reach tight corners and dig precise holes for seedlings. Its size and maneuverability make it one of the most commonly used digging tools for container gardeners.
Matching the right digging tool to the task not only improves efficiency but also extends the lifespan of your entire tool collection. Using a spade when a fork is needed can damage the blade, while using a trowel for heavy-duty digging can bend or snap the handle. Proper use helps keep your digging tools strong, reliable, and ready for future projects.
Why It Matters: The right digging tools prevent injury, reduce unnecessary strain on your wrists and back, and make gardening more enjoyable. When you invest in high-quality digging tools and use them for the right purpose, you’ll find that every task becomes smoother, faster, and far less tiring — leaving you more time to enjoy the results of your hard work.
8. Schedule Seasonal Maintenance
Create a habit of doing a full check-up on your digging tools at the start and end of each gardening season. Inspect every part of your digging tools for rust, cracks, worn handles, or loose bolts. A quick inspection helps you spot small problems before they turn into major issues.
Once inspected, give your digging tools a thorough cleaning, sharpening, oiling, and tightening. This seasonal ritual keeps your digging tools sharp, smooth, and safe to use. Consider labelling your calendar or setting reminders so you never forget this important maintenance step for your digging tools.
Seasonal maintenance also gives you the chance to replace worn-out handles, upgrade older digging tools, or add new specialized digging tools to your collection for better efficiency.
Why It Matters: Seasonal care extends the lifespan of your digging tools, improves their performance, and saves money on replacements. Well-maintained digging tools mean fewer breakdowns and less frustration during your busiest gardening months.
9. Handle Your Digging Tools
Proper handling is just as important as cleaning and sharpening your digging tools. Always grip your digging tools firmly and use the correct posture to avoid unnecessary strain on your wrists, shoulders, and back. When using heavy digging tools like shovels or mattocks, bend at the knees rather than your waist to protect your lower back.
Never swing or force your digging tools against rocks or hard obstacles, as this can cause chips, cracks, or breakage. If you encounter something too tough for your current tool, switch to a stronger digging tool or loosen the area with a pick before continuing.
Why It Matters: Safe handling prevents injuries, extends the life of your digging tools, and makes gardening a more enjoyable experience.
10. Organize Your Digging Tools for Quick Access
A well-organized storage area saves you time and protects your digging tools. Use wall hooks, pegboards, or tool racks to keep your digging tools off the ground and within easy reach. Group similar digging tools together — shovels with shovels, trowels with trowels — so you can quickly grab what you need for each task.
Consider labeling shelves or using a dedicated toolbox for small digging tools and repair parts like bolts, washers, and sharpening files. This level of organization helps you keep track of what you have and avoid buying duplicate digging tools.
Why It Matters: An organized space keeps your digging tools in good shape, reduces clutter, and saves time when you’re ready to start a gardening project.
11. Invest in Ergonomic and High-Quality Digging Tools
Choosing high-quality digging tools with ergonomic designs can make a significant difference in your gardening comfort. Look for tools with cushioned grips, shock-absorbing handles, and lightweight yet durable materials like tempered steel or fiberglass.
Ergonomic digging tools reduce hand fatigue, prevent blisters, and allow you to work longer without strain. Although they may cost more upfront, quality digging tools often last years longer and perform far better than cheaper alternatives.
Why It Matters: Comfortable, well-made digging tools improve efficiency, reduce the risk of injury, and provide a better gardening experience overall.
Final Thoughts
Caring for your digging tools is not just about appearances — it’s about making gardening easier, safer, and more efficient. When you clean your digging tools, sharpen them regularly, oil their metal surfaces, store your digging tools properly, and repair them as needed, you save valuable time, effort, and money.
Healthy, well-maintained digging tools mean a healthier garden and a more enjoyable gardening experience. There’s nothing more satisfying than knowing your digging tools are always sharp, rust-free, and ready for action.
Think of your digging tools as long-term investments. The better you care for your digging tools, the longer they will serve you — helping you dig deeper, plant faster, and garden with confidence.
Make these eight tips part of your routine, and your digging tools will reward you by staying durable, efficient, and reliable season after season. Whether you’re a beginner or a seasoned gardener, consistent care for your digging tools is the secret to a productive and thriving garden.
Frequently Asked Questions About Digging Tools
1. How often should I clean my digging tools?
You should clean your digging tools after every use. Rinse off dirt, dry them completely, and lightly oil the metal parts. This prevents rust and keeps your digging tools sharp and effective for your next gardening session.
2. What’s the best way to prevent rust on digging tools?
The best way to prevent rust on digging tools is by keeping them clean, dry, and oiled. Storing your digging tools in a dry place and dipping them in oily sand after use adds an extra layer of protection against moisture.
3. How do I know when to sharpen my digging tools?
You’ll know it’s time to sharpen your digging tools when you notice they’re struggling to cut through soil or roots. A shovel that bounces off compacted soil or a hoe that tears instead of slicing is a clear sign your digging tools need sharpening.
4. Can I repair broken digging tools, or should I replace them?
You can repair many digging tools by tightening bolts, replacing wooden handles, or filing down burrs. However, if your digging tools are severely rusted, bent, or cracked, replacing them with high-quality ones is the best long-term solution.
5. How do I store my digging tools properly?
Proper storage is essential for keeping your digging tools in top condition. Hang them on a wall rack, keep them off the ground, and store them in a dry shed or garage. Storing your digging tools in a bucket of oily sand can keep them sharp and rust-free.
6. Which digging tools are essential for a beginner gardener?
Beginner gardeners should start with basic digging tools such as a spade, shovel, garden fork, and trowel. As you gain experience, you can add specialized digging tools like post-hole diggers, mattocks, and trenching shovels to your collection.
7. How long do digging tools typically last?
With proper care, your digging tools can last for many years. Regular cleaning, sharpening, oiling, and proper storage can extend the lifespan of your digging tools and keep them working like new.
8. Can I use power tools instead of manual digging tools?
Yes, but manual digging tools are still necessary for precise work like planting, edging, and small digging projects. Power tools may save time, but well-maintained digging tools give you more control and cause less disturbance to your garden soil.